- After Effects Tutorial
How to Make a Kinetic Typography Video in After Effects
Feb 28,2020• Proven solutions
Kinetic Typography is extremely popular at the moment, and with good reason, it looks great, it enables you to tell a story and is very much suited to YouTube, which is an area of fantastic growth for creative video.
This is a basic tutorial about After Effects, professional video editing software. However, if video editing is new to you, consider Wondershare Filmora, which is a powerful but easy-to-use tool for users just starting out. Download the free trial version below.
How to Make a Kinetic Typography Video in After Effects
In this tutorial we are going to look at the basics of creating a short text animation in 2D and what the workflow is for it.
1. Setup
The first part of the project is to create your background and first text layer. In this short I will uses a darker background and bright text as we go. First, our background is created using layer>new>solid, I use a dark grey color here.

It pays at this point to have an idea about what it is you are looking to do, I'm going to have a simple drop scroll text with a static word ‘Edge' with transformations around it to create new words.
Creating a text object for Edge gets us ready to start creating our word play.

2. Creating the Components
Once we have decided what we are going to do, we need to create each text component that we will use in the animation. One object per piece of text.
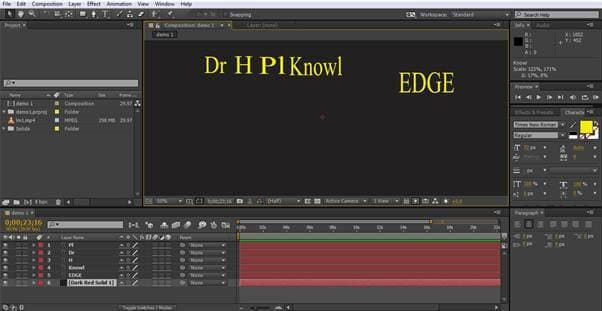
Yes, it looks like nonsense, but each group of letters is a separate object that we can combine with our anchor word ‘edge' to create new words. This is the building block of how we create our kinetic typography, so now we have the components let's move on.
3. Creating the first Keyframe
The whole process is built around the keyframes, these are the flags in the timeline for each component that tells After Effects where they should be at that precise moment. After Effects strength is its ability to fill in the animation between the various keyframes you set, and here we will take advantage. So, to start with we will create our first keyframe. Here we will activate the layer we want and hide the rest for simplicity, then position the start words as we want.
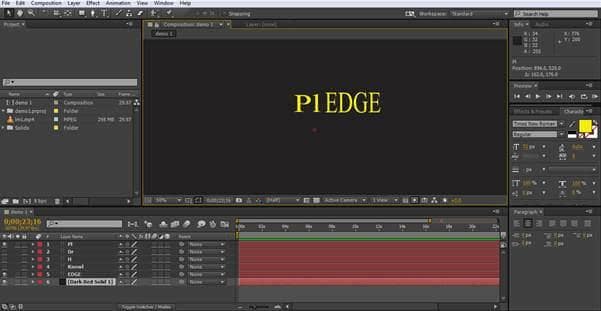
Now, we have the word ‘Pledge', made up of our anchor text ‘Edge' and the active text object ‘PL'. Making sure the ‘PL' layer is active, we can then go into its timeline settings to Transform>Position where we click the stopwatch to set the first keyframe for that object.
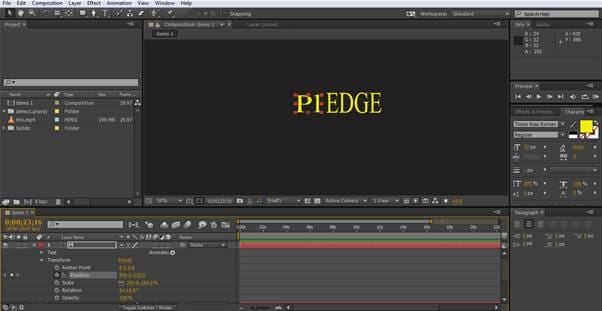
Now we have our start point set up, so we move onto some movement.
4. Moving the text
Now we have our initial keyframe set at the 15 frames mark, we can go back to the 0 frames and create a new keyframe with the ‘PL' off the top of the screen. This will give the effect of it dropping down into place at the start of the sequence. This is done as before, move the time cursor in the timeline, this time to the start, then move the object to the required point. The Keyframe is set automatically.
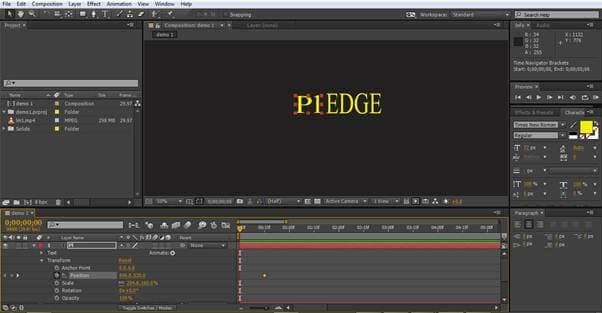
Here you can see the 1st keyframe at the 15 frame mark in gold.
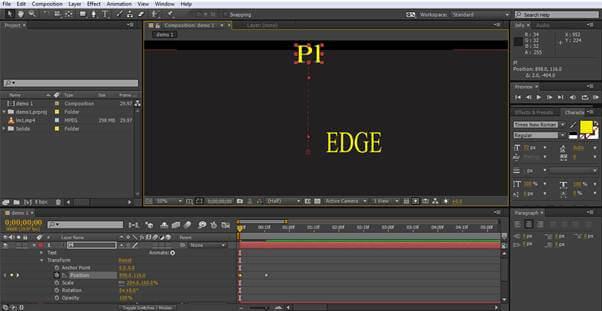
And here we see the keyframe position set. This is the 2nd keyframe we have set, but the first in the timeline, so this will be where the ‘PL' starts during the sequence.
We now look to set our 3rd and 4th keyframes, they are done in the same manner, with the third in the middle and the 4th off the screen at the bottom.
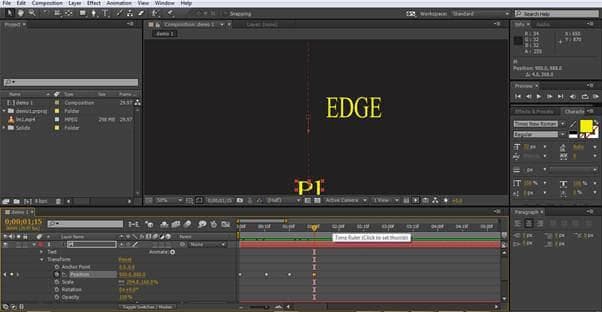
Now we have a sequence where the ‘PL' Object starts off screen, drops down into place, and then drops off the screen downwards. The interesting thing is that we can copy those movements and apply them to any other object, let's see how that fits into the project.
5. Adding in the other objects
Now, by selecting those 4 keyframes together we can copy them, and then paste them at any timeline we like into the frames for the other text objects. If we offset by 15 frames each time, can create the effect of the letters dropping down to form new words and knocking the previous ones off the screen.
To copy the keyframes is simply a matter of Command or Control C, depending on your platform, selecting the new layer, setting the time cursor at the right point and using command or control V to paste the keyframes in.
You may have to adjust the placing depending on how your letters are structured, but this allows you create an interesting effect very quickly.
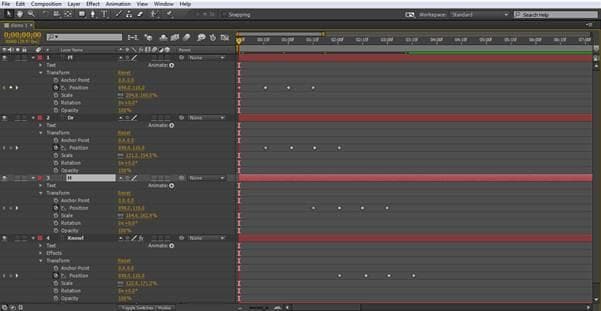
Here the timeline view is maximized to allow you to see the groups of 4 keyframes and how they are structured by overlapping to allow the appearance of the next word knocking the previous off the screen.
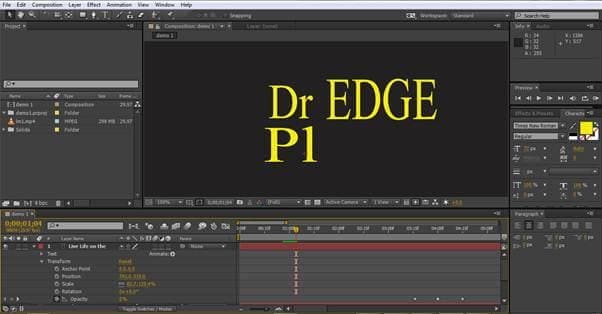
This still illustrates the effect we are creating as the PL drops off the screen the Dr takes its place.
6. Text Fade
For the last part we will look at another effect that is simple to add but very effective. To finish our little display we want to end up with the words ‘Live life on the' appearing next to our ever static ‘Edge' once the animated words have all dropped off the screen. The easiest way to do that is to fade it in.
First, we create another Text Object with the required words in it.
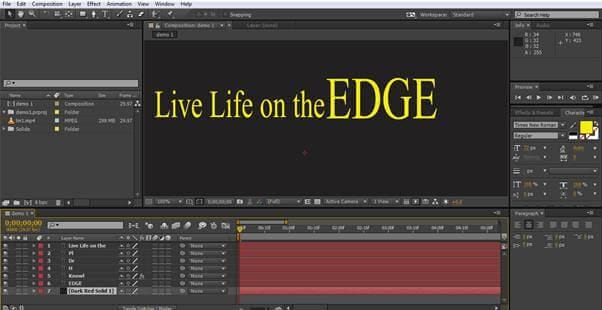
Now, we want this to appear after the other words have been and gone, so now we have it in place, we want our first keyframe for this object to be just at the end of all the other animation. Setting the curser at the final keyframe of the last word we select this object, and then choose Opacity from the Transform menu, set it to 0%, meaning it is invisible, and set that as our first keyframe for this object.

Now we move the time cursor along 15 frames again, change the Opacity to 50%, set a keyframe, then do the final move, another 15 frames, change the Opacity to 100% and set the final keyframe.
This results in the final phrase fading in in place at the end.
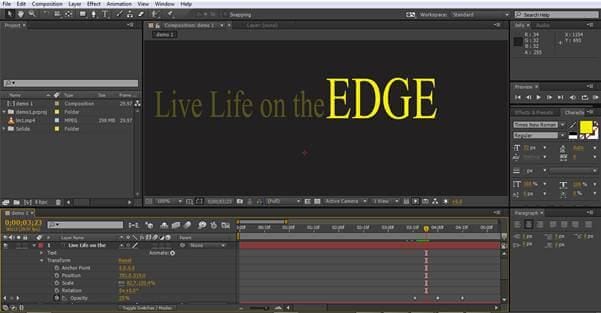
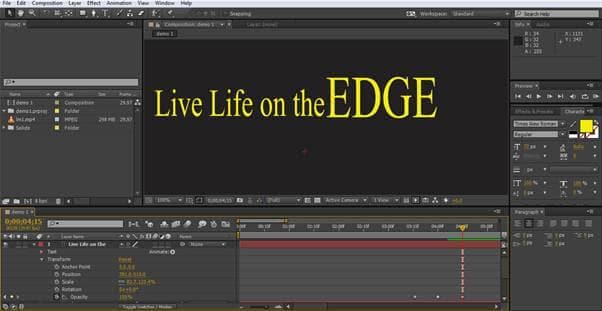
Although, as we can see, the effects are not complicated to create, they are very effective, and a great way to create eye catching content that is right on the current trends that viewers are liking.
The other options available can obviously all be used as well, with scaling and so on used as part of the project. In addition all the 3D options are also available too to enable spinning on the Z-axis as well as additional options like camera movement for the more experienced. However, whilst here we looked at the basics of the technique, there are enough options to make impressive projects before transitioning into the more advanced options, the fact that they can be done in very little time and with only a small amount of effort is a bonus.
Video Tutorial on How Make a Kinetic Typography Video in After Effects
Bring up your video to a professional level with straightforward tools.
Try It Free Try It Free


Liza Brown
chief Editor
0 Comment(s)